
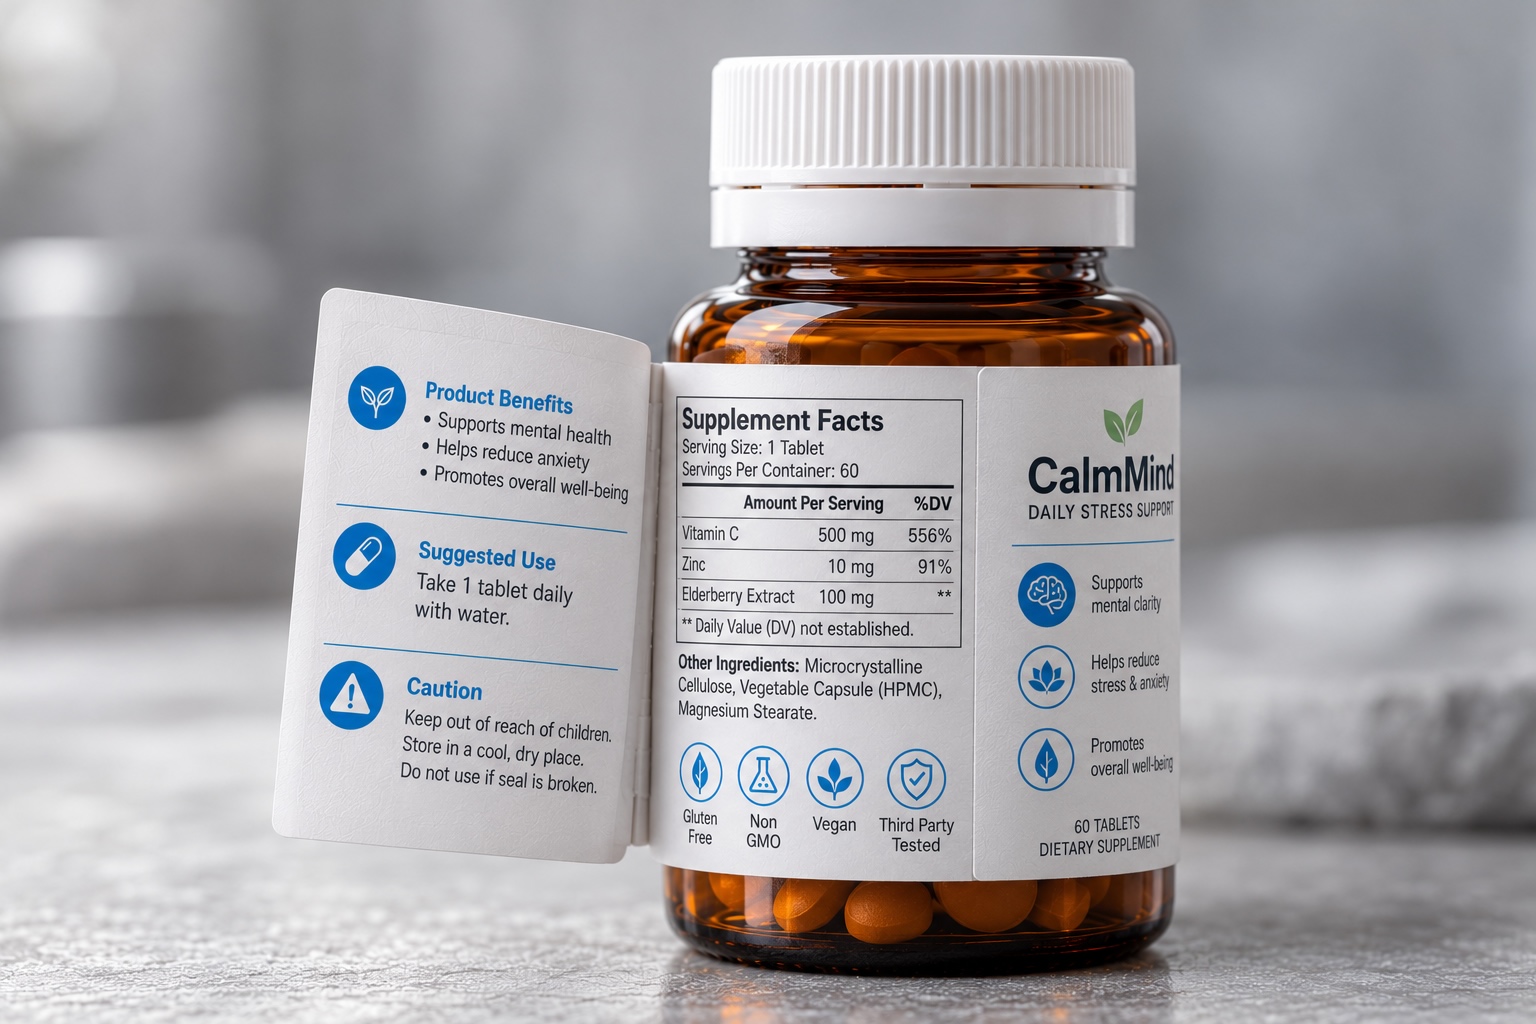
Your content has grown and the pack has not. Regulatory text expands, a second or third language gets added, a QR code and a batch number need space — and the container stays exactly the same size. At some point the type size drops below what anyone can read, or below what the regulation permits.
Multi-layer label constructions solve this by adding printable surfaces rather than area. A three-layer construction gives you five printable panels in the footprint of one label. This explains how the three common constructions work, what each is good for, and how to decide between them.

The content keeps growing. The container does not.
What “multi-layer” means here
A multi-layer label is two or more face materials bonded together, applied to the pack as a single label. The layers separate on demand to reveal printed surfaces underneath.
The critical specification is what sits between the layers. We use a low-tack adhesive, so the layers are resealable — the user opens the label, reads what is underneath, and closes it again. The content stays available for the life of the product rather than being destroyed on first opening.
That is a deliberate choice and it rules some applications in and others out:
- Resealable (low-tack) suits reference content a user returns to: dosage instructions, multilingual text, service and disposal information, helpline numbers.
- Permanent-peel suits content read once, or where opening must be evident. That is a different construction — closer to tamper-evident and VOID work.
This is also distinct from a booklet label, where a separate folded leaflet is attached to a base label, and from an extended-content label with a fold-out panel. Those add bulk. A multi-layer construction stays flat.
Staircase: three layers, five printable panels
Three face materials are stacked with each one set back from the one below, so every layer sits proud at one edge. The exposed edges form the steps that give the construction its name, and each step is the lift tab for its own layer.
The panel count works out like this. The base layer is stuck to the pack, so its underside is not printable — every other face is.
| Panel | Surface | Visible |
|---|---|---|
| 1 | Top layer, front | On shelf |
| 2 | Top layer, reverse | After first peel |
| 3 | Middle layer, front | After first peel |
| 4 | Middle layer, reverse | After second peel |
| 5 | Base layer, front | After second peel |
Panels 2 and 3 are revealed together, facing each other, which makes them a natural spread — a language on each side, or a diagram opposite its explanation. The same is true of panels 4 and 5.
Panel 5 is the one to think about carefully. It stays on the pack permanently and is the last thing visible if the upper layers are ever lost. Safety information, a helpline number or a disposal instruction belongs there rather than on a layer that can walk away.
Suits: multilingual markets, regulatory text that has outgrown the face, dosage and administration detail, anything where the content must stay with the pack through use.
Partial peel: one extra panel, not four
Here a second layer covers only part of the base label. Most of the face stays single-layer at normal thickness; one zone carries a peelable flap with printed content on its reverse and on the base beneath it.

One zone carries a flap. The rest of the label stays single-layer.
This is the right answer when the staircase is more construction than the job needs. Two extra panels instead of four, in a defined area, with most of the label unchanged.
It has a practical advantage worth knowing about. Because only part of the label is built up, the overall thickness change is smaller than a full multi-layer construction, which generally means less disruption to an existing application line.
Suits: a promotional or authentication code, batch and expiry detail that changes between runs, a single block of secondary instructions, a second language on a pack that only needs one.
Split peel: two flaps, hinged on opposite sides
A base label carries two peelable flaps, each covering roughly half of it, hinged on opposite edges. They open outward like a pair of doors.

Two flaps, hinged on opposite edges, each opening without disturbing the other.
This also yields four extra panels — the reverse of each flap, and the base beneath each — but it organises them differently from the staircase. The staircase is sequential: you work down through the layers in order. The split peel is parallel: two independent compartments, either of which can be opened without touching the other.
That difference matters more than it sounds. If your two content blocks are unrelated — English under one flap and Hindi under the other, or operating instructions under one and warranty terms under the other — the split peel lets a user go straight to the one they want. A staircase would make them peel through the first to reach the second.
Suits: two-language packs where neither language is secondary, content that splits cleanly into two unrelated halves, anything where a user should not have to disturb one block of content to read another.
Choosing between them
Start with how much content you need to add and whether it is one body or several.
| If you need | Construction | Extra panels |
|---|---|---|
| A single extra block in one area | Partial peel | 2 |
| Two unrelated blocks, read independently | Split peel | 4 |
| A long run of content read in sequence | Staircase | 4 |
Three further questions decide it in practice.
Does the content have an order? Dosage then side effects then disposal is sequential — a staircase matches how it is read. Two languages are not sequential, and a split peel serves them better.
Does any of it have to survive the pack’s life? Whatever sits on the base panel stays. Put the information you would least like to lose there.
What is the application line like? Every added layer adds thickness. A partial peel changes the least. This is worth raising with your packaging team before artwork rather than after samples.
A note on codes under a flap
Putting a QR code or an authentication code on a hidden panel is a common request, and the adhesive choice decides whether it works.
With a resealable low-tack construction, a hidden code stays scannable indefinitely. The flap opens, the code is read, the flap closes. That suits a code a user or a pharmacist may need more than once — a product information link, a reorder code, a service registration.
What it does not give you is tamper evidence. A resealable flap, by definition, closes again without trace. If the point is to prove the label has not been opened, you need a permanent-peel or VOID construction instead, and that is a different conversation about adhesive and release layer.
It is worth being clear which of the two you actually want before artwork, because the constructions are not interchangeable.
Specifying one
To quote a multi-layer construction we need seven things:
- Finished label size and the container it goes on
- How many panels of content, and roughly how much text per panel
- Which panel has to stay on the pack permanently
- Substrate — paper or film, and any resistance requirement
- Application method and line speed
- Whether any panel carries a barcode or variable data
- Languages, if more than one
If you have the content but not the layout, send the content. Working out how it divides across panels is part of the job, and it is usually faster than you doing it first and us rearranging it.
Minimum order quantity is 5,000 labels per SKU — the same as a standard self-adhesive label, and lead time is unchanged. Multi-layer construction does not carry a volume premium here, which surprises people who have been quoted differently elsewhere.
Our presses run up to 450 mm (17.7 in) web width with print repeats to 508 mm (20 in), across flexo, rotary screen and digital UV inkjet. Where a panel carries a barcode we verify it on a calibrated verifier to ISO/IEC 15416 — worth doing on multi-layer work, because a code printed on a thin upper layer behaves differently from the same code on the base.
Closing
If you are reaching the point where type size is the compromise you keep making, a multi-layer construction is usually the cheaper answer than redesigning the pack. Send us the content and the container and we will tell you which of the three fits, or whether none of them does.
Rishab Jain is a partner at Jain Transfer Products, a self-adhesive label manufacturer in Noida, Delhi NCR, established in 1982. He writes here on the technical side of specifying and producing labels.
Running out of label area? Get in touch — tell us the container, the content and the languages, and we will come back with what is achievable before you commit to artwork.
